A beginner bodyweight workout at home needs no equipment at all. You use your own body weight as resistance through a handful of basic movements — squats, wall push-ups, glute bridges, lunges, bird dogs and planks — for a full 15 to 20 minutes. The moves are deliberately simple, the impact is low, and you can scale every one of them up or down depending on where you are today.
That is the honest version of what gets promised online. You will not build a heavy barbell physique from a living room, and the first two weeks will feel more about coordination than sweat. What you will get is real: stronger legs and glutes, a steadier core, better balance, more energy, and a habit that costs nothing and fits in a small apartment.
Most beginners stall because they are handed thirty exercises and no starting point. This plan gives you one, with exact reps, rest times and a clear way to scale. Last updated October 2026.
Table of Contents
- What You Need
- Step-by-Step
- Step 1: Prepare Your Space and Warm Up
- Step 2: Try Supported Squats
- Step 3: Perform Wall Push-Ups
- Step 4: Practice the Glute Bridge
- Step 5: Complete a Standing Calf Raise
- Step 6: Add a Gentle Bird Dog
- Step 7: Finish With a Cool-Down
- Common Mistakes
- Frequently Asked Questions
- How often should a beginner do bodyweight workouts?
- How long should a beginner bodyweight workout at home last?
- Do I need weights to get in shape with bodyweight training?
- What do I do when bodyweight exercises stop getting harder?
- How do I modify these exercises for balance or joint problems?
- When should I stop exercising during a workout?
- Conclusion
What You Need
Almost nothing, which is the whole point. No dumbbells, no membership, no mat required — although a towel or a thin mat on a hard floor makes kneeling movements far more comfortable on your knees and wrists.
You do need a small, clear patch of floor. Two arm lengths by three arm lengths is enough for every movement in this guide, so a bedroom, a living room corner or even a hotel room works. Push furniture back, clear any rugs you might catch a foot on, and check that the floor is dry and not slippery.
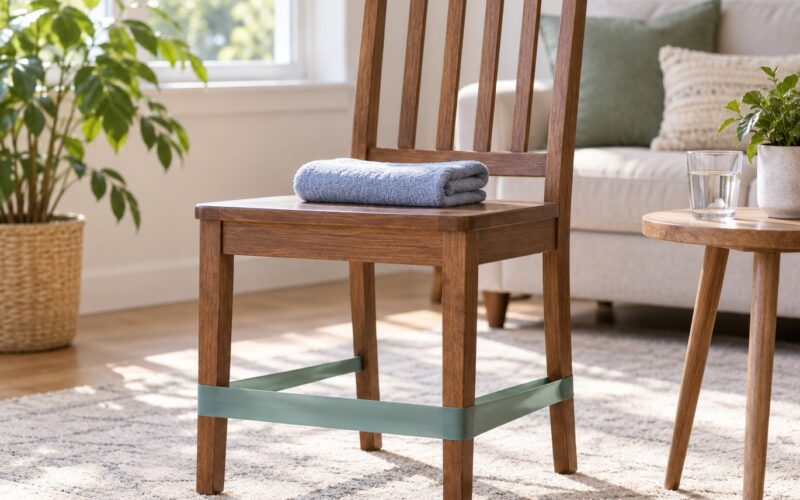
Two household objects earn their keep here. A sturdy chair with a solid back gives you balance support for squats and a light anchor for calf raises. A blank wall turns an impossible push-up into a doable one. Neither should wobble — test the chair by leaning on it firmly before you trust it with your weight.
Wear clothes you can move in, and keep water within reach. You will want to sip between rounds rather than gulp at the end.
One important note before you start: talk to a doctor, physical therapist or other qualified professional before beginning a new exercise program if you have an injury, are pregnant or recently postpartum, have a heart condition or another medical condition, or are managing symptoms that flare with movement. That is general guidance, not a diagnosis — your own clinician can tell you what is safe for you specifically. Nothing here replaces that conversation.
Step-by-Step
The routine below is one circuit you can repeat two or three times. Do the movements in order, rest as stated, and aim for quality over rep count. If a movement feels shaky, drop the reps rather than the form.
Step 1: Prepare Your Space and Warm Up
Before the first rep, spend five minutes moving easily. Start with slow walking in place for one minute until your breathing lifts but nothing is heavy. Then take your neck through gentle side-to-side tilts, five each way, with the shoulders relaxed and hanging.
Follow with shoulder circles, ten backward and ten forward. Roll your hips in a loose circle, five per side, and finish with ten ankle circles each way and ten calf raises with no weight at all. This part is not a formality — it is what lets your joints move through their range without protesting later.
If you have five minutes less than planned, do the walking plus the shoulder and ankle circles. Something beats nothing.
Step 2: Try Supported Squats
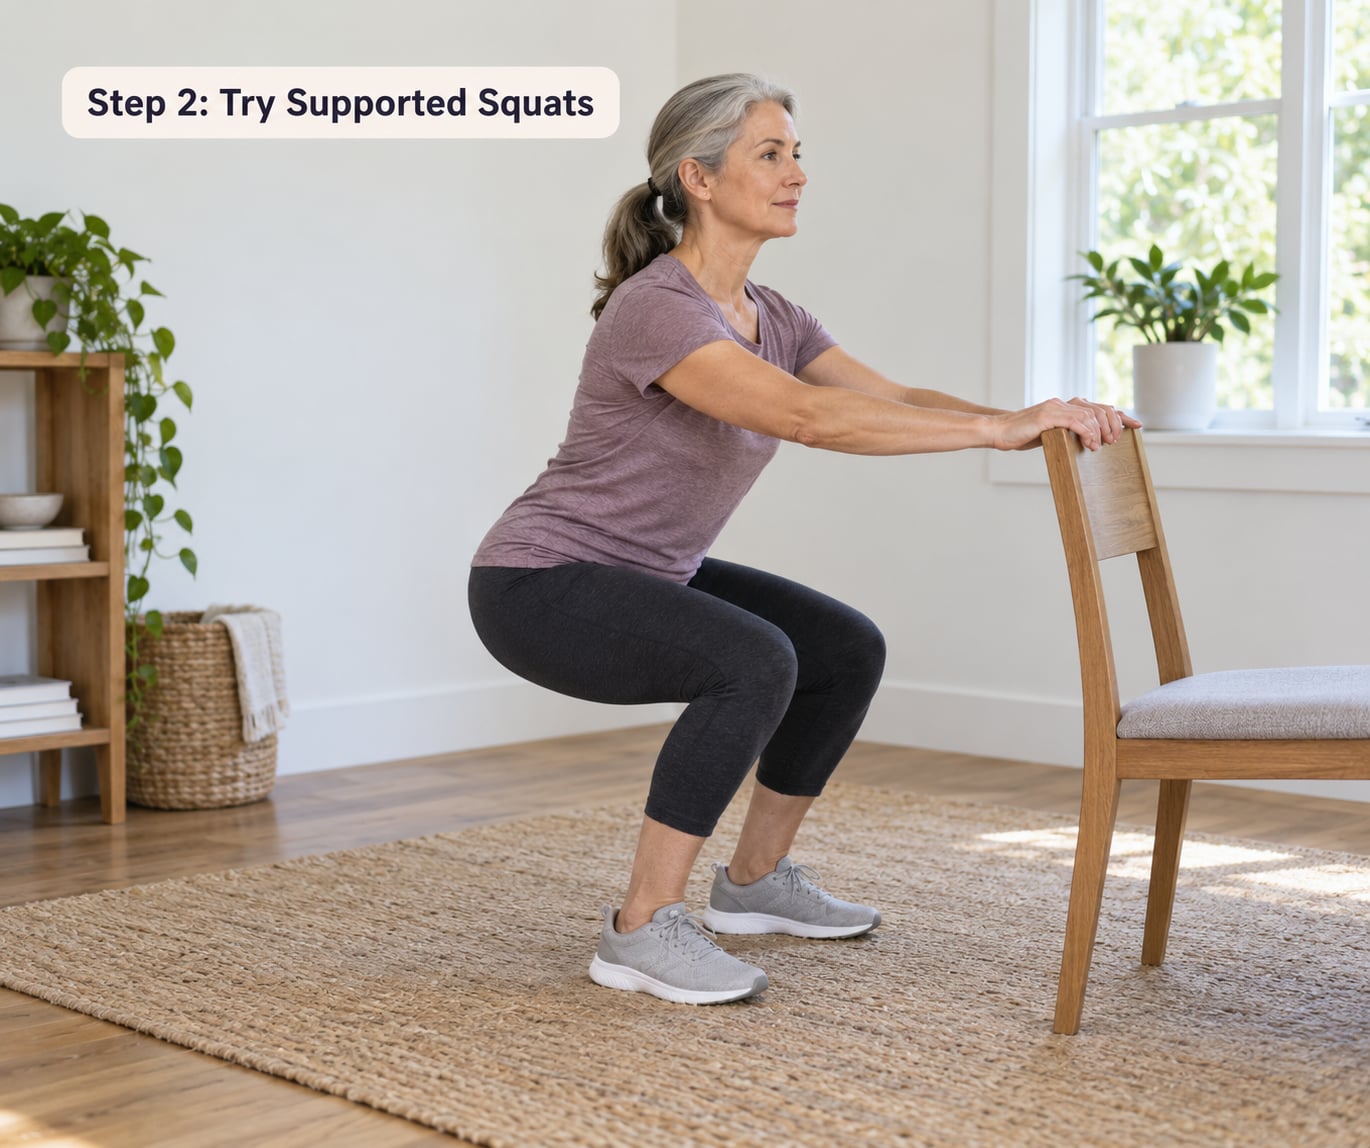
Stand with your feet about shoulder-width apart, toes turned slightly out. Lightly touch the chair back with your fingertips for balance only — the plan says nothing about how hard to push. Take a breath, soften your knees, and push your hips back and down as though you are sitting toward the chair.
Stop when your thighs are roughly parallel to the floor, or wherever you can go without your heels lifting or your lower back rounding. Drive through your whole foot to stand back up, and breathe out on the way up. Inhale as you descend, exhale as you rise — most beginners hold their breath without noticing, and it is the fastest way to feel out of breath.
Reps: 8 to 12. Rest: 45 to 60 seconds.
To make it easier: sit all the way back to the chair and use your hands to push off it, then stand without pausing. To make it harder: add a pause for two seconds at the bottom, or hold a full squat for 15 to 20 seconds. Both are harder than adding weight, which you do not have.
Step 3: Perform Wall Push-Ups
Face a wall a step and a half away, feet back, and place your palms flat on the wall at chest height and slightly wider than your shoulders. Your body should form a straight line from head to heels. Bend your elbows to about 45 degrees from your torso, lower your chest toward the wall under control, and push back to straight arms.
This trains the chest, triceps and front deltoids without asking your wrists to carry all your weight — which is why it is the right first push-up for most beginners. Keep your ribs down rather than letting them flare, and breathe steadily the whole way down.
Reps: 8 to 15. Rest: 45 seconds.
To make it harder: walk your feet back one step at a time until you are doing an inclined push-up, keeping a straight line from head to heels. If your wrists or elbows protest: make a loose fist and push from the knuckles, or angle your hands slightly outward.
Step 4: Practice the Glute Bridge
Lie on your back with your knees bent and feet flat on the floor, heels about a hand’s length from your hips. Press through your heels and lift your hips until your knees, hips and shoulders form a straight line. Hold for a one to two count, squeezing your glutes hard, then lower slowly.
The cue that matters here is your ribs. If your lower back arches and you feel it in your spine rather than your glutes, the lift went too high or too fast — go back to a smaller range until you can feel the squeeze in your backside. Breathe normally throughout; do not hold your breath to brace harder.
Reps: 10 to 15. Rest: 45 seconds.
To make it easier: bend your knees a little wider and keep the range short. To make it harder: add a two-second hold at the top, or lift one foot off the floor for the last few reps of each set.
Step 5: Complete a Standing Calf Raise
Stand tall, one hand on the wall or chair back for balance. Rise onto the balls of your feet as high as you comfortably can, pause for a second at the top so you actually feel it, then lower until your heels touch the floor under control.
Slow lowers are where this one lives. Dropping straight down uses momentum and does almost nothing; a two-to-three second descent gives the calves a real eccentric workout. Ten to fifteen reps is plenty, and you can use one hand or both if balance is the limiting factor.
Reps: 10 to 15. Rest: 30 seconds.
Step 6: Add a Gentle Bird Dog
Start on hands and knees with hands under shoulders and knees under hips. Your back should be flat, like a tabletop. Brace your core lightly and extend your right arm straight forward and your left leg straight back, roughly parallel to the floor, until your body forms a straight line from fingertips to heel.
Hold for two to three seconds, return, and switch sides. The temptation is to lift the leg higher than the torso line, which opens the lower back — stop at the height where your hip and shoulder stay level. Breathe steadily rather than holding your breath; if you cannot breathe without wobbling, make the reach shorter instead. That is a perfectly valid version, and it is the one to do when your balance is still growing.
Reps: 6 to 8 per side. Rest: 45 seconds.
This is the one that answers a question people ask constantly: yes, bodyweight exercises for beginners at home can genuinely train the deep core and the glutes without a single plank, and without any floor crunches that pinch the neck.
Step 7: Finish With a Cool-Down
Walk slowly around the room for one to two minutes until your breathing comes back down. Then sit or stand and reach for your toes with soft knees, holding for 20 seconds without bouncing. Stretch each calf by stepping one foot back and pressing the heel down for 20 seconds per side. If your chest feels tight from the wall push-ups, open the arms wide and clasp behind your back for the same count.
Finish by asking one honest question: how did that feel? A dull warmth in the muscles you used is exactly right. Mild muscle soreness the next day is normal and fades as you repeat the routine. Sharp pain, joint pain, or anything that made you change your movement mid-set is not normal and is a signal to stop and reassess.
When the circuit is done and you have time, repeat it two more times. That gives you roughly 18 minutes of work. Stop after one round on busy days — a short session finished beats a long one skipped.
Common Mistakes
Almost every problem I see in beginners is a technique issue rather than a fitness-level issue. These are the six that come up repeatedly, with the fix for each.
- Rushing the repetitions. Speed steals your form. Slow each rep down until the last one looks like the first, then speed up again.
- Collapsing the lower back. In squats and bird dogs, the torso folds forward. Cue yourself to keep a neutral spine and move the hips back rather than down and forward.
- Holding your breath. Breathe out on the effort — the standing phase of a squat, the upward phase of a press. Gasping is fine; going blue is not.
- Starting too advanced. Push-up, jump lunge and single-leg balance moves belong at week three or later. Doing them in week one is the fastest route to sore wrists, sore knees and quitting.
- Skipping the warm-up. Five easy minutes on joints and muscles measurably reduces that first-session ache.
- Confusing effort with pain. Working a muscle to near failure produces effort you can measure in reps. Joint pain does not build strength and is a reason to modify or stop.
One more habit matters more than any of these: put the workout on a schedule you can keep. Three short sessions a week beat an ideal two-hour plan you attempt once. Pick two or three fixed days, treat them like an appointment, and track your rep counts — concrete numbers like “12 wall push-ups” are far more motivating than a vague feeling of progress, and they tell you exactly when to level up.
Progress in this order: add reps first, then shorten rest, then slow the tempo, then choose the harder variation. Adding difficulty before the easier version feels clean is how beginners get hurt.
Frequently Asked Questions
How often should a beginner do bodyweight workouts?
Three sessions per week is the sweet spot for most beginners, with at least a day between each one so your muscles and joints recover. Two sessions will still build strength, three builds it faster, and daily short sessions tend to burn out before they stick. Give yourself two rest days, keep the sessions short, and raise the difficulty only after two weeks of clean reps.
How long should a beginner bodyweight workout at home last?
Fifteen to twenty minutes covers a full session: five minutes warming up, roughly twelve minutes of circuit, and three minutes cooling down. That is long enough to build real strength and short enough to do on a weeknight. If you only have ten minutes, run one round of the circuit with no rest between movements and skip the standing cool-down entirely.
Do I need weights to get in shape with bodyweight training?
No. Bodyweight training builds strength, mobility, coordination and cardiovascular fitness using nothing but your own mass, and for most beginners it is more than enough for the first six months. Weights become useful later, when movements stop challenging you. If you want extra load before then, hold a water bottle, slow the tempo or add one leg.
What do I do when bodyweight exercises stop getting harder?
Pick one variable and change it. Increase reps, drop rest between sets from 60 to 45 seconds, slow the lowering phase to three seconds, or swap in the harder variation listed for that movement, such as a single-leg glute bridge. Progress one thing at a time and keep a written log. If two forms get easy while others do not, progress only those.
How do I modify these exercises for balance or joint problems?
Use a wall or chair for balance support in squats and calf raises, shorten the bird dog reach instead of extending it fully, and keep wall push-ups at hand height rather than dropping to knuckles if your wrists ache. For knees, use smaller squat ranges and stationary holds instead of lunges. If pain appears during the exercise, stop and check with a doctor or physical therapist.
When should I stop exercising during a workout?
Stop immediately for sharp or joint pain, chest pain, unusual shortness of breath, dizziness, or any cramping or cramping-like sensation in the abdomen. Feeling a muscle working hard, breathing hard, and mild soreness the next morning are all normal. If symptoms return every session at the same intensity, that is a reason to see a healthcare professional before adding more.
Conclusion
The safest first step is almost boring: clear a small patch of floor, put your fingertips on a sturdy chair, and do ten supported squats. Add ten wall push-ups. Stop there if that is all you did, because the session only counts if you come back and do it again next week.
Build the habit first and the difficulty second. Reps, then rest, then tempo, then harder variations — that order is what keeps bodyweight exercises for beginners at home working for you long after week one.