To use a rowing machine for fat loss, row 20 to 40 minutes at a steady pace you could hold for a full session, three to four times a week, and keep a modest calorie deficit alongside it. The machine does not melt fat on its own, but it stacks a full-body, joint-friendly cardio session into a small room, which is why it keeps showing up in fat-loss plans.
A beginner can start in the first ten minutes: strap your feet in, set the damper somewhere in the middle, and practise ten slow rows before worrying about numbers. Most of the work is technique, and technique is what decides whether you burn 200 calories or 300.
This guide covers the setup, the four parts of the stroke, a two-week starter schedule, how to progress, and the errors that quietly slow results down. It is general fitness information, not medical advice, so if you have heart, blood pressure or joint conditions, are pregnant, or are recovering from an injury, talk to a doctor before you start pulling.
Table of Contents
- What You Need
- Step-by-Step: How to Use a Rowing Machine for Fat Loss
- Set Up the Rowing Machine for Fat Loss Sessions
- Find a Comfortable Starting Resistance
- Practice the Basic Rowing Stroke
- Build Your First Two Weeks of Sessions
- Increase Duration and Intensity Gradually
- Pair Rowing With Fat-Loss Habits
- Common Mistakes in Your First Sessions
- Common Mistakes
- Frequently Asked Questions
- How long should I row on a rowing machine to lose fat?
- Is a rowing machine better than walking for fat loss?
- Should I row every day when trying to lose fat?
- What resistance level should a beginner use?
- How do I know if I am rowing with the right technique?
- Will rowing a specific number of calories guarantee weight loss?
- Conclusion: Start With One Controlled Session
What You Need
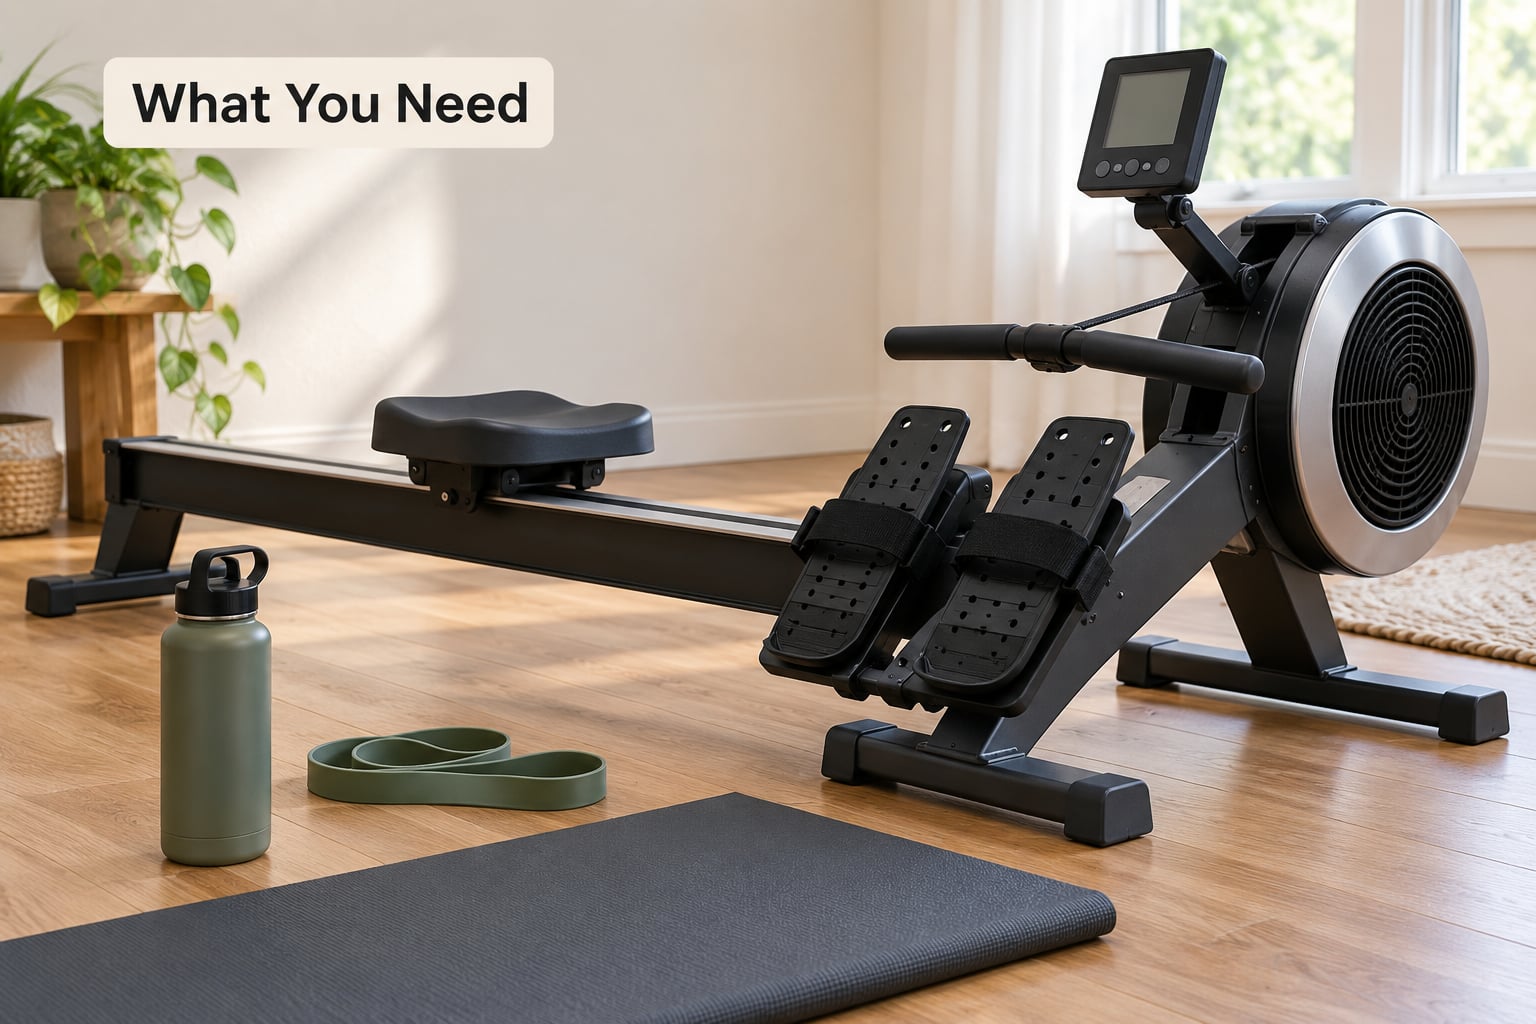
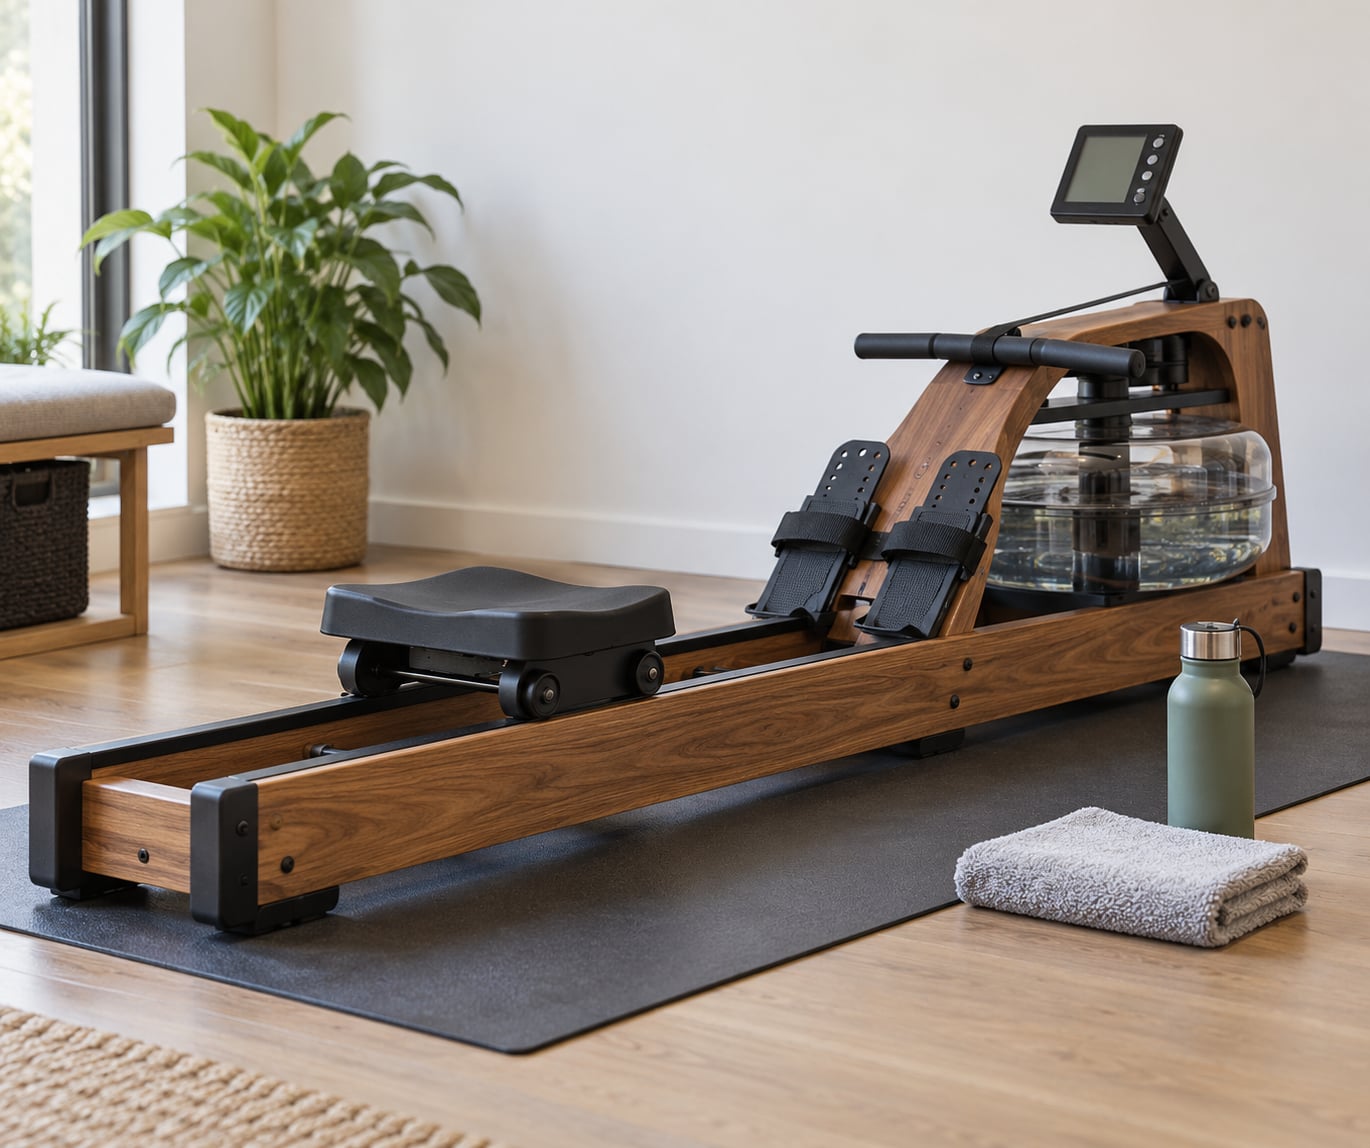
Any indoor rower will do. Air, magnetic and hydraulic models all train the same movement; the fan-based machines just give smoother, more readable data on stroke rate and split time, which helps when you want to see progress over weeks.
What you actually need around the machine:
- A water bottle and a towel, because you will sweat more than you expect from a seated pull.
- Fitted clothing and flat shoes. Bare feet on the footplates work, but trainers feel better after twenty minutes.
- A phone or TV within reach for follow-along rows once the basics are automatic.
- About 40 clear centimetres behind the rail so the seat has somewhere to travel.
- A resistance band or a rolled towel, useful for stretching the calves and hamstrings after a session.
Give the machine a quick check before your first row. The rail should be wiped down, the seat roller clean, the strap buckles working, and the machine sitting flat on the floor. On a machine with a pull cord, make sure the cord is seated in the flywheel and not frayed.
Do not start a training block on the same day you are dealing with chest pain, a fever or an injured back. And if you are completely new to exercise, walking fifteen minutes a day for a week before your first row makes the first session much easier.
Step-by-Step: How to Use a Rowing Machine for Fat Loss
The routine runs in this order: set the machine up, find a resistance you can control, learn the stroke, build two weeks of easy sessions, then add time before you add intensity. Support the work with food, water, sleep and steps, and fix the usual technique errors early.
Set Up the Rowing Machine for Fat Loss Sessions
Knowing how to use a rowing machine for fat loss starts before the first stroke, and takes about five minutes. Sit on the rail facing the flywheel, put both feet in the straps with the heel of the foot on the heel plate, and pull the strap snug so your heels do not lift on the drive.
Adjust the footplate so your shins are roughly perpendicular to the floor when you are at the front of the stroke. Too flat and your knees will be bent too far at the catch; too steep and you will feel it in the back of your legs. Every machine has a numbered setting, so write down the one that feels right. You will want the same number on every session for comparison.
Move the seat to the front position, then find the damper lever or dial. It controls how much air the flywheel pulls against, which is resistance, not weight. Now locate the monitor buttons so you know how to start, pause and reset, and how to switch between stroke rate, split time and distance.
When you finish, the screen should read zero strokes and zero distance. If it kept the last session, reset it, because comparing a new row against yesterday’s data is the whole point.
Find a Comfortable Starting Resistance
Start in the middle of the damper range, around 4 or 5 on a typical 10-step scale, and treat anything higher as a day when you are fresh.
Here is the part most guides get wrong: the damper setting changes how hard the flywheel feels, not how many calories you burn. A harder setting at a slower stroke rate and an easy setting at a fast stroke rate can burn the same energy. Use the damper to make the movement comfortable, then use stroke rate to change intensity.
Test it with ten rows at three settings. Low should feel almost too easy, middle should feel like you are working on most rows, and high should make your legs burn before your arms get tired. Pick the middle one and stay there for your first two weeks.
If you cannot row ten in a row at 20 strokes per minute on a setting, lower the damper before you go faster. There is no prize for fighting a heavy flywheel with bad technique.
Practice the Basic Rowing Stroke
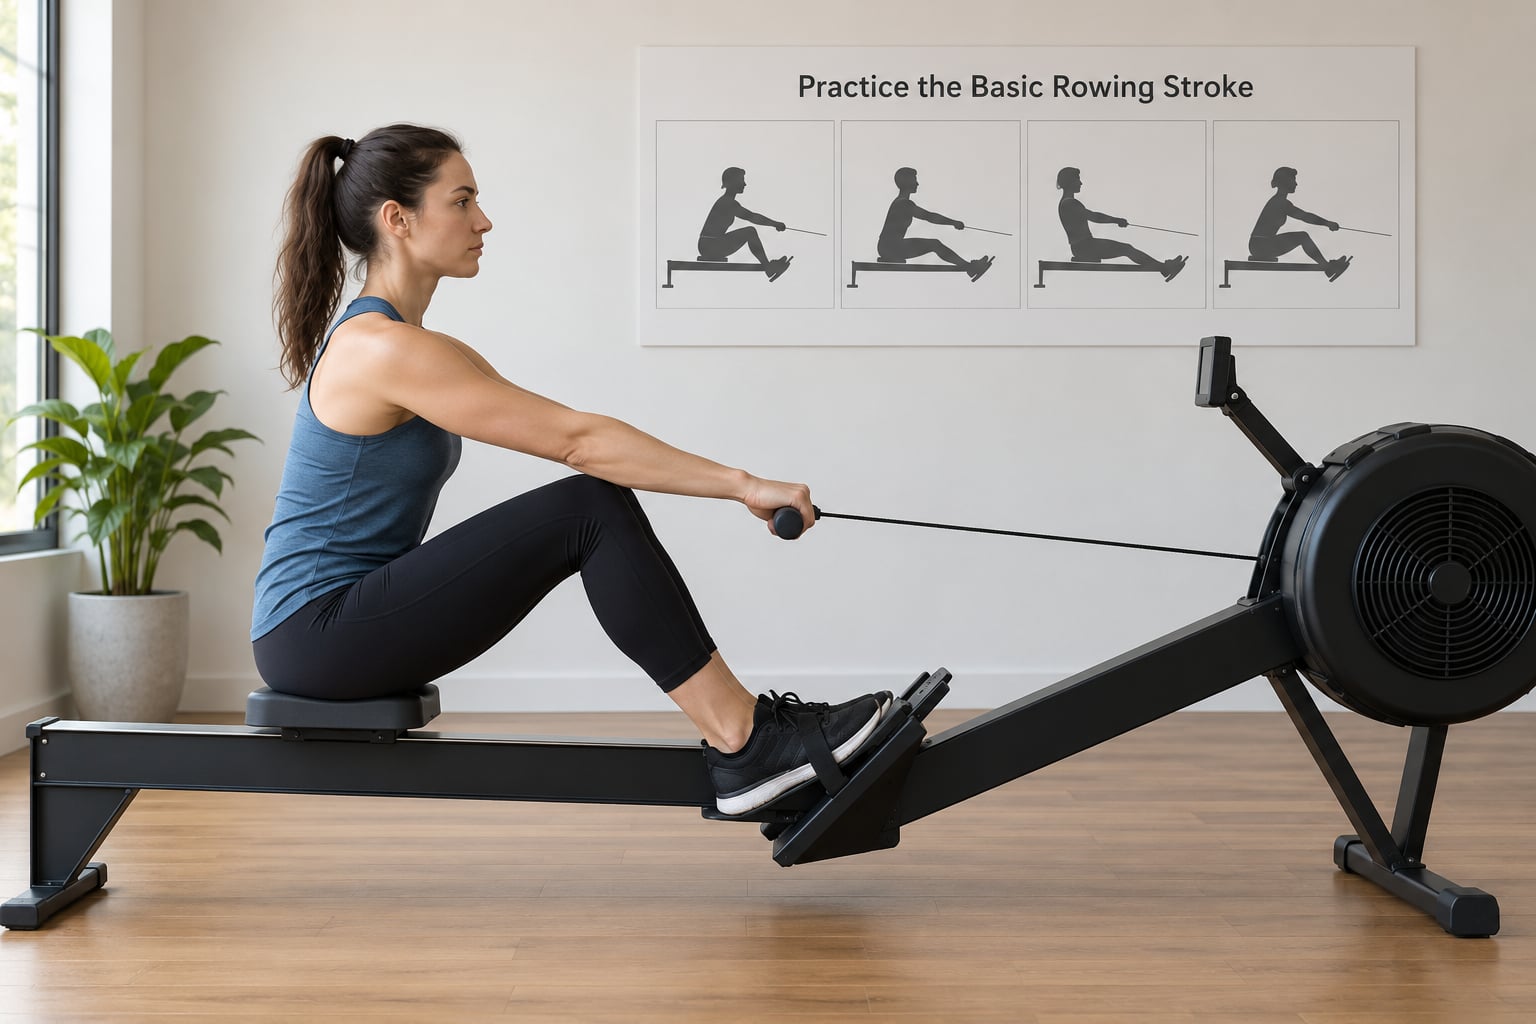
One stroke has four phases, and the order matters more than any setting:
- The catch. Knees bent to about 45 degrees, shins vertical, torso upright with a slight forward lean from the hips, arms straight in front. Your shoulders are down, not shrugged.
- The drive. Push the legs first. The legs produce roughly 60 percent of the power, the torso and hips another 30 percent, and the arms about 10 percent. Arms stay straight until your legs are almost flat.
- The finish. Legs flat, handle to your lower ribs or navel, elbows behind you, torso leaned back maybe 15 to 20 degrees, chest open. Squeeze your glutes at the top rather than arching your lower back.
- The recovery. Reverse the order: arms away first, then pivot the body, then bend the knees and slide forward. The handle travels back toward the front of the machine while the seat rolls.
Breathing follows the drive: exhale as you push, inhale on the way back. Rushing the recovery is the single most common error, and it steals power from the next stroke.
A useful check for beginners is to row ten strokes at about 15 strokes per minute, rest, then repeat. The second set should feel close to the first. If it falls apart, the first set was too hard.
Build Your First Two Weeks of Sessions
Fat loss from rowing comes from repetition, so the goal for two weeks is finishing every planned session without feeling destroyed. Three sessions a week with rest days between them works for most beginners.
A typical week looks like this:
- Session A. 10 minutes easy rowing as a warm-up, then 15 minutes at 18 to 20 strokes per minute, then 5 minutes slow and easy.
- Session B. Same structure, 20 minutes at the same effort. No faster than session A.
- Session C. 20 minutes steady again, aiming to keep your stroke smooth rather than your number high.
- Rest days. Walk instead. Daily walking is one of the easiest ways to add fat-loss activity without extra joint load.
Inside a session, row in short blocks instead of one long push. Twenty strokes on, twenty strokes easy, repeated, keeps your rhythm and stops you blowing out in the first five minutes.
Rowing at 18 to 22 strokes per minute is the range most training guides point to for steady aerobic work. Anything faster than about 26 turns the session into an interval effort, and intervals have their own recovery needs.
Increase Duration and Intensity Gradually
Add time before you add resistance. Going from 20 to 25 minutes is a smaller step than moving the damper three clicks, and it is easier on your lower back.
A three-week progression:
- Week 3. Add five minutes to the middle of each session, still at the same damper and the same stroke rate.
- Week 4. Keep the length and try 22 to 24 strokes per minute for the middle block only. Leave the first and last ten minutes easy.
- Week 5. Try short intervals: ten strokes hard, then forty seconds off the seat, repeated eight times. Finish with five minutes steady.
Alternate hard and easy days. Two hard sessions in a row rarely produce better fat loss than two hard sessions with a day between them, and the second one is usually shorter and uglier. Most people who stall are not under-training, they are under-recovering.
Roughly three sessions a week, with two full days off, is a sustainable pattern. Rowing on most days is fine if the extra days are genuinely easy, but it is a poor way to add fat loss.
Pair Rowing With Fat-Loss Habits
Rowing is the exercise half. Fat loss needs an energy deficit, and that part happens in the kitchen and the rest of your day. A modest deficit that you can hold for months does more than an aggressive one you abandon in three weeks.
Some practical pairings:
- Protein and fibre at every meal, so you stay full while trimming portions.
- Water before and during sessions, because thirst gets mistaken for hunger.
- Steps through the day. Rowing burns a lot in one block, but steady movement burns across the whole afternoon.
- Sleep of seven hours or more. Short sleep makes hunger harder to control and recovery slower.
- Two or three strength sessions a week, because muscle is what keeps your metabolism useful as you lose fat.
One thing to be clear about: you cannot choose where the fat comes from. Rowing will shrink your waist and your whole body over time, but no machine targets belly fat specifically. If belly fat is the goal, judge progress by your waist measurement and how your clothes fit, not by one spot on your body.
Calorie estimates on the monitor are useful as a rough guide only. For a beginner, 20 to 30 minutes of moderate rowing commonly shows somewhere in the 200 to 350 calorie range, and it varies with body weight and intensity. Treat those numbers as a comparison between your own sessions, not as a target.
Common Mistakes in Your First Sessions
These are the errors I see most often in the first fortnight, and each has a quick fix:
- Slamming the handle back at the end of the recovery. Slow the return until it takes about twice as long as the drive.
- Pulling with the arms first. Keep the arms straight until the legs are nearly straight.
- Holding tension in the shoulders and neck. Shake them out between longer blocks.
- Rounding the lower back at the finish. Think about pulling the handle to your ribs, not arching over.
- Chasing the monitor. Watch your stroke rate and feel, not your split time, for the first month.
- Rowing through pain. Sharp back, hip or knee pain is a stop signal, not something to push through.
Common Mistakes
Almost every stalled rower I have talked to is making at least one of these, usually two.
Rushing the recovery. The return should take longer than the drive. When it does not, your heart rate climbs, your technique falls apart and your session ends early.
Rowing with the arms. The legs provide most of the power. A row that feels like an upper-body pull burns less than you think and irritates your lower back.
Holding tension. Grip, jaw and shoulders carry stress into every stroke. Unclench between intervals and let the handle sit lightly in your hands.
Breathing wrong. Breath-holding to force a heavy stroke starves the effort and can make you light-headed. Exhale on the drive, inhale on the recovery.
Choosing too much resistance. Heavy resistance at a slow rate is a strength movement, not a fat-loss session. It also increases low-back fatigue, which is why sore backs show up in week two for many beginners.
Chasing monitor numbers. Every machine estimates calories differently. Track your own numbers week to week instead of comparing the display to a treadmill or to what an app predicts.
Training hard two days running. Legs and lower back need a day between hard sessions. Most missed weeks are scheduling mistakes, not effort mistakes.
Rowing through pain. Blisters on the handle and soreness in the lower back are normal for a couple of weeks and need a different response: soften the grip, use a chalk or grip pad, and shorten the session.
Ignoring everything outside the machine. Rowing hard while eating more than you burn is the most common reason for no change on the scale. Track food loosely for two weeks and the pattern usually becomes obvious.
On tracking, weigh yourself at most once a week at the same time of day, and put more weight on measures that move faster:
- Waist measurement at the navel, taken every two weeks.
- Progress photos from the same angle and lighting.
- Resting heart rate in the morning before you get out of bed.
- Your 20-minute row time, or your stroke rate held steadily for ten minutes.
- How you feel climbing stairs, which is the honest test.
Weight moves in daily swings that have nothing to do with fat. If your waist, your 20-minute row and your resting heart rate all improve while the scale does nothing, you are losing fat and replacing it with muscle and water.
Frequently Asked Questions
How long should I row on a rowing machine to lose fat?
Twenty to forty minutes is the useful range for most beginners. Long enough for your heart rate to stay elevated, short enough that you can hold your technique for the whole session. A common mistake is going long and hard once a week instead of rowing moderate sessions three or four times. If your stroke breaks down in the last five minutes, the session was too long, not too short.
Is a rowing machine better than walking for fat loss?
Neither one is automatically better. Rowing uses more of your body per minute, so a 30-minute session usually burns more than a 30-minute walk. Walking is easier to sustain daily, works in any shoes anywhere, and carries almost no injury risk. Many people do best with both: rowing three or four times a week and walking every day.
Should I row every day when trying to lose fat?
You can, but extra days should be genuinely easy. If you row hard and often, legs and lower back get no recovery time and your numbers flatten out. Three or four sessions a week with rest days between them is a better pattern for fat loss, and walking on the off days keeps daily activity high without adding joint load.
What resistance level should a beginner use?
Start in the middle of the damper range, usually around 4 or 5 on a typical 10-step scale. Pick a setting where ten consecutive rows at about 18 strokes per minute stay controlled and your legs still finish before your arms. Write the number down and keep it steady for two weeks so your sessions are comparable.
How do I know if I am rowing with the right technique?
Check four things: your arms stay straight until your legs are nearly flat, your back stays flat at the finish rather than arching, the handle returns toward the front before you bend your knees, and your knees never collapse inward. If your lower back or hamstrings ache before your breathing does, your recovery is probably too fast.
Will rowing a specific number of calories guarantee weight loss?
No. Monitor calorie numbers are estimates that differ between machines, and fat loss depends on your total energy balance over weeks, not on one session. Treat the display as a way to compare your own workouts. The scale will fluctuate daily, so judge progress on waist measurement, your 20-minute row and how you feel climbing stairs.
Conclusion: Start With One Controlled Session
Do this next: put the machine in a clear space, strap your feet in, set the damper in the middle, and row ten slow strokes until the catch, drive, finish and recovery feel like one movement. Then finish a 20-minute session at 18 to 20 strokes per minute with a few minutes easy on each end.
Do that three times next week with rest days between, keep your food and steps steady, and watch your waist and your 20-minute row instead of the daily scale weight. Progressions take weeks, not sessions, so repeating what you did last week with cleaner technique beats chasing harder every day.